
Technical Info
I've tried a number of things for mounting a video (or still) camera on a wing-tip over the years. It's more difficult on
modern gliders, as most everything is enclosed. You have the cross-bar junction (where the cables emerge from the sail, and
the wing-tips (if you don't have the Sensor-style tensioned tips). Besides the difficulty of finding something to attach to,
I also wanted it to be easy, as otherwise I would never get around to attaching the camera. So, the first step was
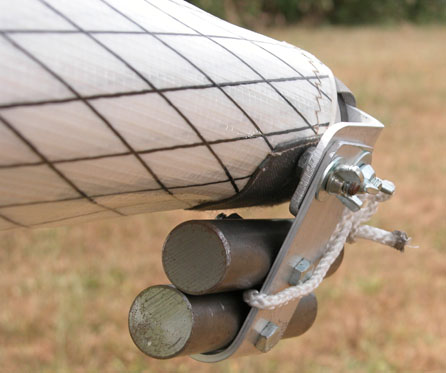
to create easy attachment points. I did this by drilling into the plastic plugs in the ends of the wingtips, and permanently
fastening an L-shaped bracket:
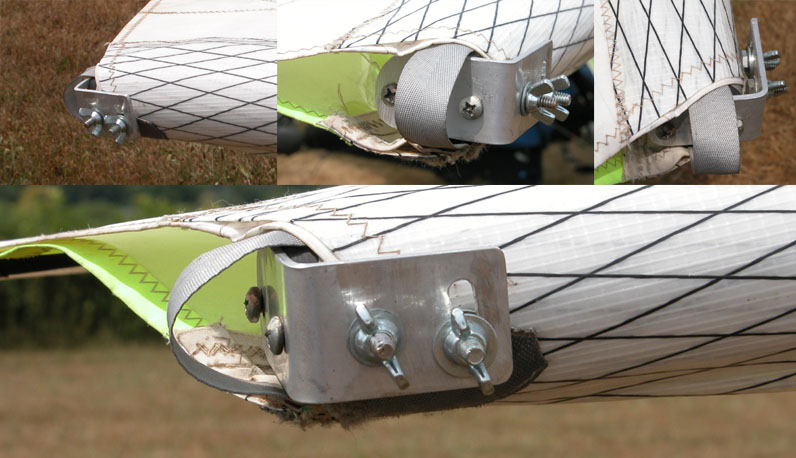
Note that there are two bolts with wing-nuts for attaching the camera mount, one of which is slotted to provide angle adjustment. The bracket and bolts are small, and are a permanent part of the glider. They are on the outer side of the tips
when the glider is in the bag, so there is no wear point with respect to the rest of the glider.
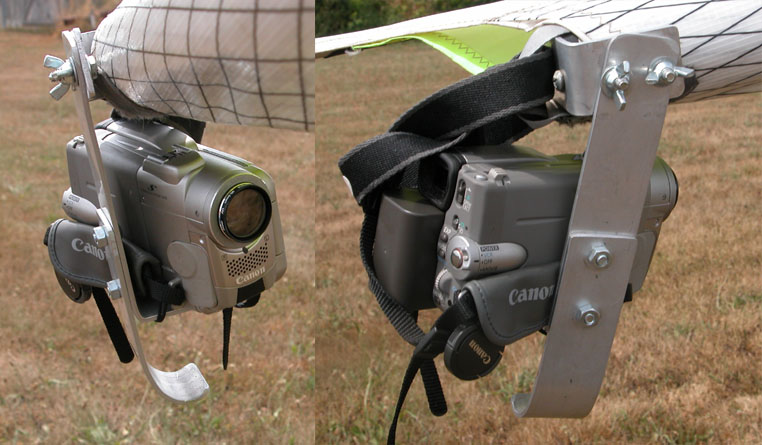
My first attempt at a video cam was with a Mini-DV camcorder, which weighted a couple of pounds. Here is the bracket I
made to hold the camera and attach to the wing-tip mounts. There is a single bolt into the base of the camera, which allows
rotation in the horizontal plane. The slotted hole in the tip mount allows up/down angle adjustment, so it can be easily aimed
when attached. Because this was an expensive piece of gear on a hang glider wing-tip, I added a protective bracket to the
bottom of the mount - it will hit before the camera does.
You may have noticed I said it weighed a couple of pounds. That much weight was too far out (16 feet?) to leave unbalanced,
so I made a set of balance weights to go on the opposite tip (an idential tip-mount had been installed there too).
Now, this meant a lot of weight at the wing-tips, and it did slow down the roll response, but not too bad. What I did not
expect (and did not realize for a couple of flights), was how far behind the hang point the camera and weights were!
Yep, some significant pitch-up moment being produced there. I did not notice it in active air (when I usually fly pulled in
a little bit anyway), but was surprised to notice the glider on the verge of stall when flown hands off in calm air.
I was never very happy with this setup (still slow to attach, lots of added weight, and trim problems), so I did not use
it very often. The only videos I made with it that I've posted are Thrust Turns and
Flight Operations, both posted in the
Video Gallery
After those efforts a few years ago the whole set-up has mostly been put away in a box.
I had been looking into the "Helmet Cams" being sold, but most were low resolution, and I thought maybe something better
would eventually turn up. I was right, and this spring (2009) I discovered the
Contour HD High Definition Helmet Cam. I had to wait over a month to get it, but this 5-oz camera (10 oz including
the aluminum mounting bracket) was the answer I had been seeking.
I simply used my old video camera mount bracket, and stuck on one of the several camera mount
options for this camera (peel and stick adhesive). The mount itself has a sort of velcro attachment, so the mount can be
separated and rotated to a new position.
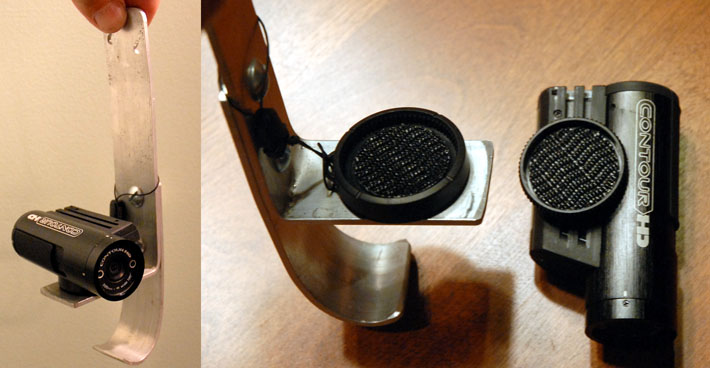
Also, the lens of the camera can be rotated through 180 degrees, so that it can be mounted in almost any position. And it's light weight requires no counter-balance weights, so it is very quick to attach.
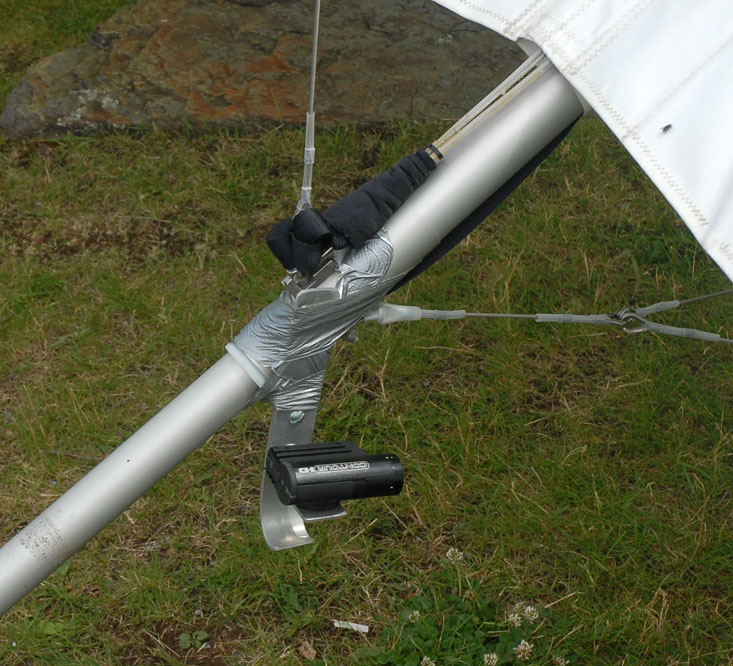
Best of all, it takes excellent videos, as seen in these clips from a FlyIn at Hyner View Pennsylvania in July 2009. (This video is 720p HD - my newer version of the cam - Contour+2 - 2017 - is 1080p)
In the clip above, there is also a keel-mounted point of view. That was achieved using the same mounting hardware and
lots of Duct Tape: