

Technical Info
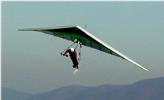
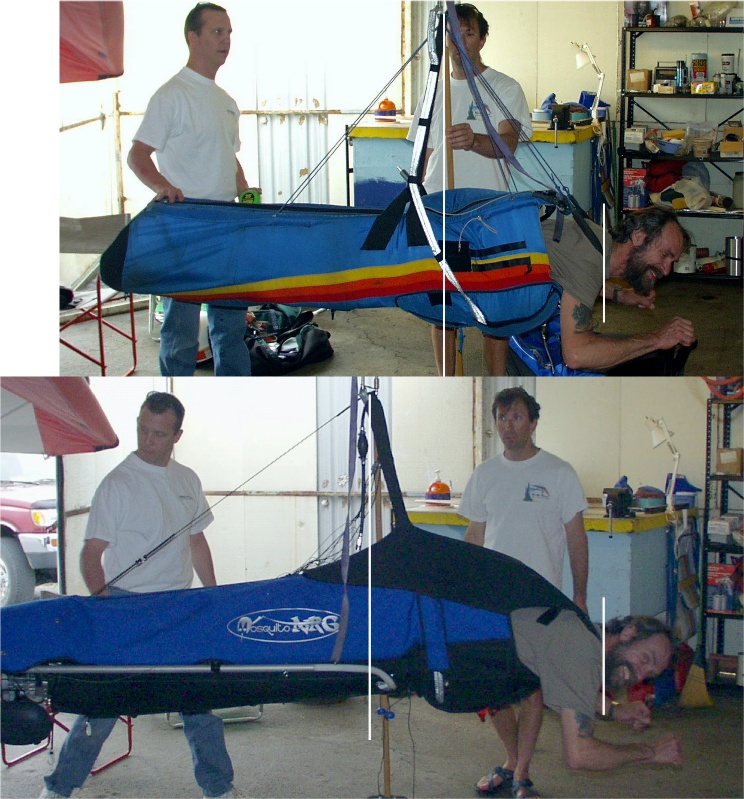
Bar Position - Many newcomers to flphg are confused by the apparent change in control bar position. Even with power off, the control bar will be almost a foot further back than you are used to when free flying Nothing about the glider or how it flies has changed. What has happened is that, with the weight of the engine below your feet, the CG (center of gravity) of the pilot and harness are lower on your body than without the engine. With no pressure on the bar, the CG will be directly beneath the hang point. Thus, it is your body position that has moved forward relative to the hang strap. This is graphically illustrated in this CG Comparison CG Comparison. Note that vertical lines are drawn through the hang strap and at the shoulder, and the relative distance between these lines. This situation is generally the same whether or not power is applied (although there can briefly be large changes in relative position when suddenly applying or reducing power - see section below).
Bar Position Changes With Power - The above applies to
the engine being off. Now, what happens when the engine is turned
on? What happens to
the control bar position when you add power? Think about
if first, before reading the explanation: Control Bar Position Changes With Power
Added
Engine Torque and Gyroscopic Forces
- Many pilots talk of engine torque causing the "right wing to dip on
takeoff", but this explanation does not stand up under close
examination. A discussion of what rotational forces and moments
are caused by the addition of power, and a possible explanation of the
'right wing dip" phenomenom: PowerForces.php
Wikipedia FLPHG Overview A nice Wikipedia summary and overview of flphg: Powered Hang Glider
Glider Rack - When I got a newer vehicle, I discovered that the front end was all plastic, nothing to attach a glider rack to. Here was the solution I finally came up with: Glider Rack.
Video Camera Mount - I have played with mounting cameras on the wing-tip now and then, but never found a suitable arrangement until recently, when I used one of my earlier Video Cam Mounts with a New HD Helmet Cam
Red Head Conversion - The Red Head is a cylinder head modification developed by Hidden Mountain
in the early 2000's and offers a significant increase in performance. There was
some impressive data to prove it posted on the former Hidden Mountain site, but that data is no longer available.
I bought a Red Head when they were still available, and
here are the details of the Red Head Installation
NOTE: In the years since this was first posted a number of pilots reported engine failures (piston seizing) using the Red Head modification. Others have continued to use this mod successfully. Mine is still working OK, but I am careful to monitor the head temperature and not run too long at full throttle. Even if you are not interested in this modification, the link above shows some useful Radne disassembly illustrations.
Electric Start Conversion - Photos and text about converting the Mosquito NRG to Electric Start. Many units now come with electric start, and there is also a dual (manual and electric) start option. Even if you are not doing a conversion, this link provides useful disassembly information.
Clutch Disassembly - A photo series showing the parts and dis-assembly of the Radne centrifugal clutch.
Electric Starter Disassembly - a photo series showing the parts and disassembly of the Radne electric starter.
Walbro WG Carb Disassembly - a photo series with diagrams and explanations, showing disassembly of the Walbro WG Carb. See section below for more Walbro information and resources.
Gerry Farell - Explorer Modifications - Gerry was
active in trying many modifications on his Explorer harness. Most
of them involved the Radne engine, so they should apply to most flphg
units. Gerry is not currently active, and the links below are archival
copies of his pages - I have not been able to find them currently posted
anywhere else. I've put the last know working URL's below for reference.
These are some good detail photos showing carb setup and fuel-line
modifications: Explorer Modification Archive Page
And this is a throttle plate modification to improve idling of the Radne. I have done this modification and it
works well: Idle Adaptation Archive Page
Large (225) Falcon Glider Modification - Marked up Wills Wing Falcon drawing showing modification notes:
Falcon 225 details drawing
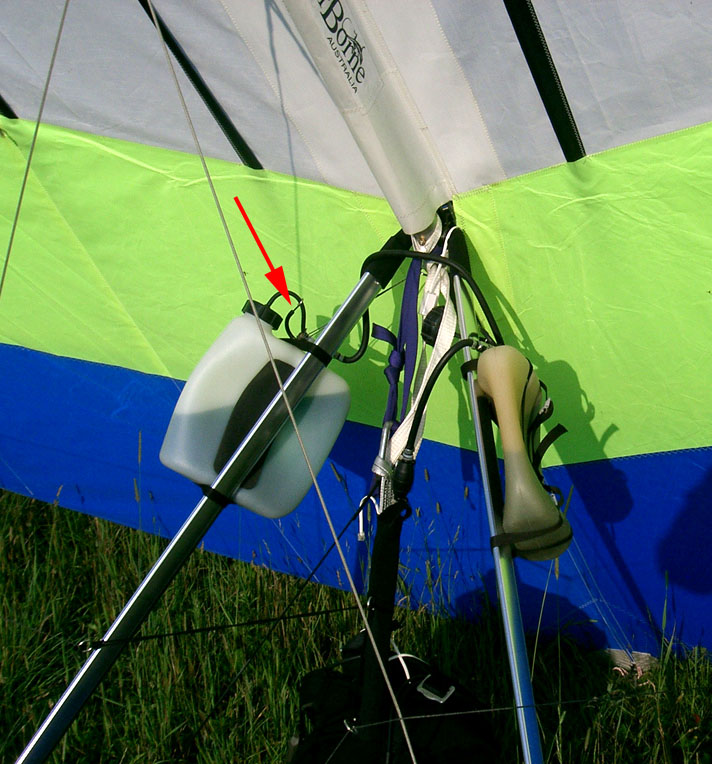
Dual Tank Setup - A second fuel tank is a Mosquito option (presumably the same general method could be used for other makes too). The vented gas cap on the single tank is replaced with a different cap that has a hose attached, with the same sort of quick disconnect used on the harness. This attaches to the fitting on the second tank. As fuel is drawn out of the first tank, the resulting vacuum pulls fuel out of the second tank, until it is empty. This shows the setup, as well as a mistake to avoid - forgetting to open the vent on the second tank: Flat Tanks. The red arrow points to the plugged vent line. Over half the fuel from each tank had been burned, and the engine was still running.
Platform Launching - Here's another way of launching if you have bad knees or only rough fields available. It's a modification of the ATOL type platform tow launch, except you don't need a long field or winch, or winch operator: Platform Launching
Wind Drifter Testing Laboratory - It's not fancy, but it was
easy to rig up. I plan on using it for comparing different props and
gearing. A 7 foot long piece of PVC pipe transfers the thrust from the bottom of
the harness boot to the Thrust Measurement Device (the fact that it looks
just like a bathroom scale is purely coincidental :) WD
Testing Lab
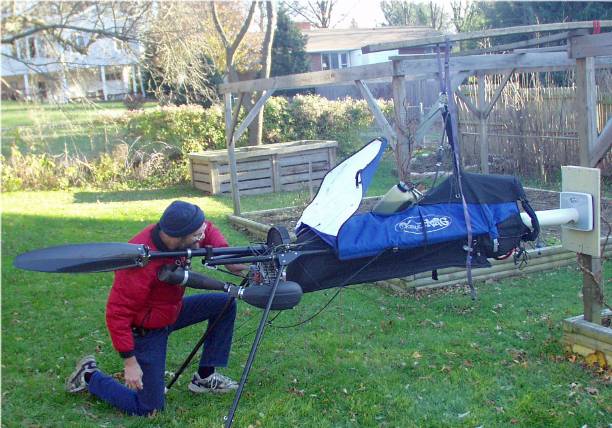
Keel Attachment Piece - Most people just use a tubing sleeve,
(either inside or outside) of the keel to make the keel end removable. But if
you have just gotten a new metal lathe/mill set, like I had, then you might get
carried away with something fancier: Keel Attachment
This started out as a solid bar of aluminum, machined to a tube. The pop-up
button started life as a brass pipe plug. The slot machined in one end is to
allow the bracket to be inserted into the keel past a bolt that attaches cables.
A pop-rivet attached the bracket to the keel extension.
Technical Tips - This document contains a collection of
useful tips and information compiled by Ben Rembalski and posted in the Yahoo
Groups FLPHG List Files section: TechnicalTips.pdf (160
kB) Note: the Yahoo Groups have closed, and this can now be found on the new forum site
at Technical Tips on Groups IO flphg forum
Technical Tips2 - This site contains a collection of useful
technical tips (former non-working link)
for the Mosquito harness and Radne engine. NOTE: this
site appears to have been taken down. The URL I have is
http://www.woodleydowns.demon.co.uk/ TechnicalIssues.htm -
Viktor Placek was kind enough to locate an archived version in
http://web.archive.org/ and combined it into a single page: Technical Tips 2-from Archive
Mosquito
A10 (Older Model) - Thanks to Garry Lee for this manual
scan. MosquitoA10Manual.pdf
(1.1 MB)
Mosquito NRG Manual - this
came with my NRG in 2001. It says there would be a new manual in
a short time, but I have not seen it if a new one exists: NRGManual.pdf
(3.5 MB)
DoodleBug Owner's Manual -
DBManual.pdf (10 MB)
Explorer Manual - thanks to
Gerry for this one: ExplorerManual.pdf
(6.0 MB)
Raven Owner's Manual -
RavenOwnersManual.pdf (100 KB)
NRG Spare Parts List - This
is also available directly from the Swedish Aerosport website: NRGSparePartList.pdf (3.3 MB)
Radne Engine Manual - A complete scan of the Radne Manual in Adobe pdf format. The engine diagram in this manual is for the pull-start model. Here is the Electric Start Engine Diagram
Radne Factory - Radne produces lightweight 2-cycle engines.
The 120cc model is currently used by all of the power harness
manufacturers. They have a nice online store and catalog:
https://www.radne.com/Store
Spark Plug Cross Reference - Check out this chart to find a
local replacement for your Radne spark plug: http://www.nology.com/chart.html
The NRG uses the Nippon-Denso #W22MP-U
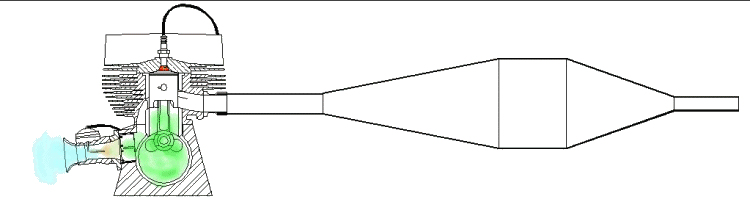
2-Cycle Engine Animation - This is an excellent animation of how a 2-cycle engine works, including the role of the expansion chamber in the exhaust. Note that the animation shows a Reed Valve between the carb and crankcase. The design of the Radne is slightly different in that it uses a "piston ported" design which does not incorporate a Reed Valve.
Radne Power Curve - These KW vs RPM power curves were supplied by Radne for the 120 Aero engine. You have a choice of either the original Microsoft Excel Spreadsheet or printed in an Adobe pdf format file. (Note: 1 KW=1.341 HP; 10.21 KW=13.7 HP) Here is another version of the plot which shows Power and Torque in both metric and English units.
This is a collection of Walbro carb information from a variety of
sources. The Walbro WG6/8 (Radne part # 32048) is standard on the
Radne 120 Aero engine used by the majority of flphg units.
Walbro WG Disassembly - a photo series with diagrams and explanations, showing disassembly of the Walbro WG Carb
Walbro Metering Lever Height Gage - The official Walbro gage for setting metering lever height. You can print it an cut it out, or simply use the dimensions shown. To print it, be sure "page scaling" is turned off in Adobe Acrobat reader WalbroGage.pdf
Walbro Service Manuals - This PDF is a comprehensive comprehensive, with 33 pages of useful information for Walbro Diaphragm Carburetors Service Manual in general, while this PDF is WB-specific Service Manual
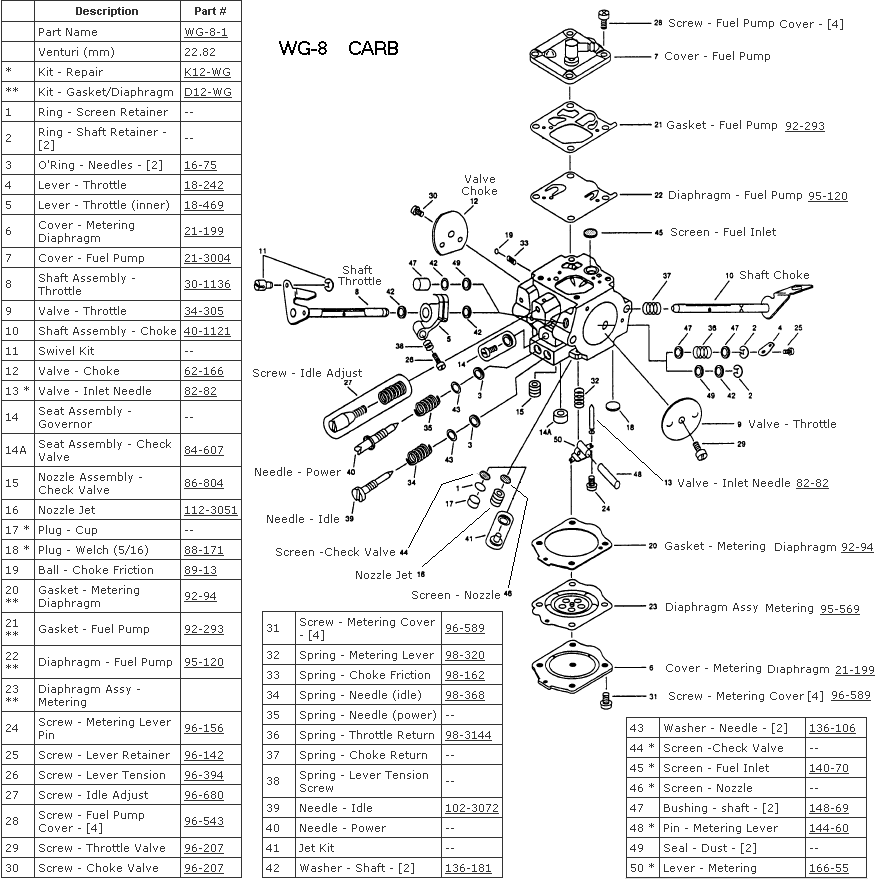
Walbro WG Carburetor - Here is a diagram and parts list for
the Walbro WG-8 carb:
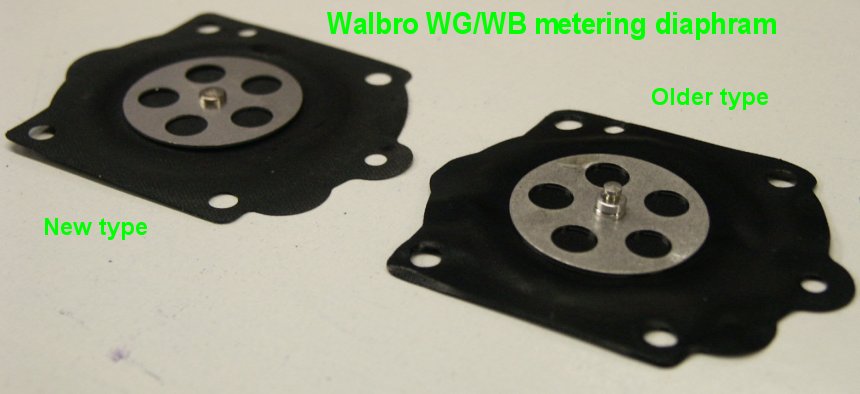
This photo for is useful for identifying
the difference between the older and newer WB/WG diaphrams: WB_MeteringDiaphram.jpg The older
style diaphragm has a button which allows easy bleeding of air from the
fuel lines, the new one apparently does not.
Wallbro Troubleshooting Chart - walbro_chart.jpg
Units Conversion - a very
handy (and free!) utility to convert between almost any sets of
units. It sits on my desktop and is used quite often:
http://www.joshmadison.com/software/convert/
Prop Calculators and Information:
; How to measure pitch on your prop: http://www.mh-aerotools.de/airfoils/propgeo5.htm
; Powered paraglider site with information about repairing wooden and
composite props. It is up to you to decide whether you consider
this a safe thing to do: http://www.olympicppg.com/
More Calculators: More useful calculators can be found here: http://www.csgnetwork.com/relhumhpcalc.html
See How It Flies - An excellent on-line book about all
aspects of flight physics and techniques. http://www.av8n.com/how/ NOTE: the actual link above will take you to the Web Archive copy of the page, the page at the link displayed generates virus warnings.
Weather Stuff - Weather is a very basic part of soaring flight, and even when it is not a flying day, learning about soaring
conditions has given me an appreciation for all sorts of weather. This is a collection of observations I have found
interesting: Weather Stuff
Tiny Tach - A tachometer is
very useful, especially before take off, when you can't decide whether
or not the engine is delivering full power. A very popular model
in the flphg community is the Tiny Tach: https://www.tinytach.com/tinytach
The standard 6 foot cable is a bit short, be sure to add
a couple of extra feet when you order.
Air Band Radios - Airband radios are useful if you are flying
from or near an airport. There are a number of small hand-held
air
band radios available now. See Air Band Radios for FLPHG for more info.
Battery Information -
With the electric start, radios, etc., it is likely you will have
battery issues to work out at some point. Here is a handy
resource: http://www.powerstream.com/BatteryFAQ.html